Related Articles

Fun and Crafty Ways to Decorate Easter Eggs
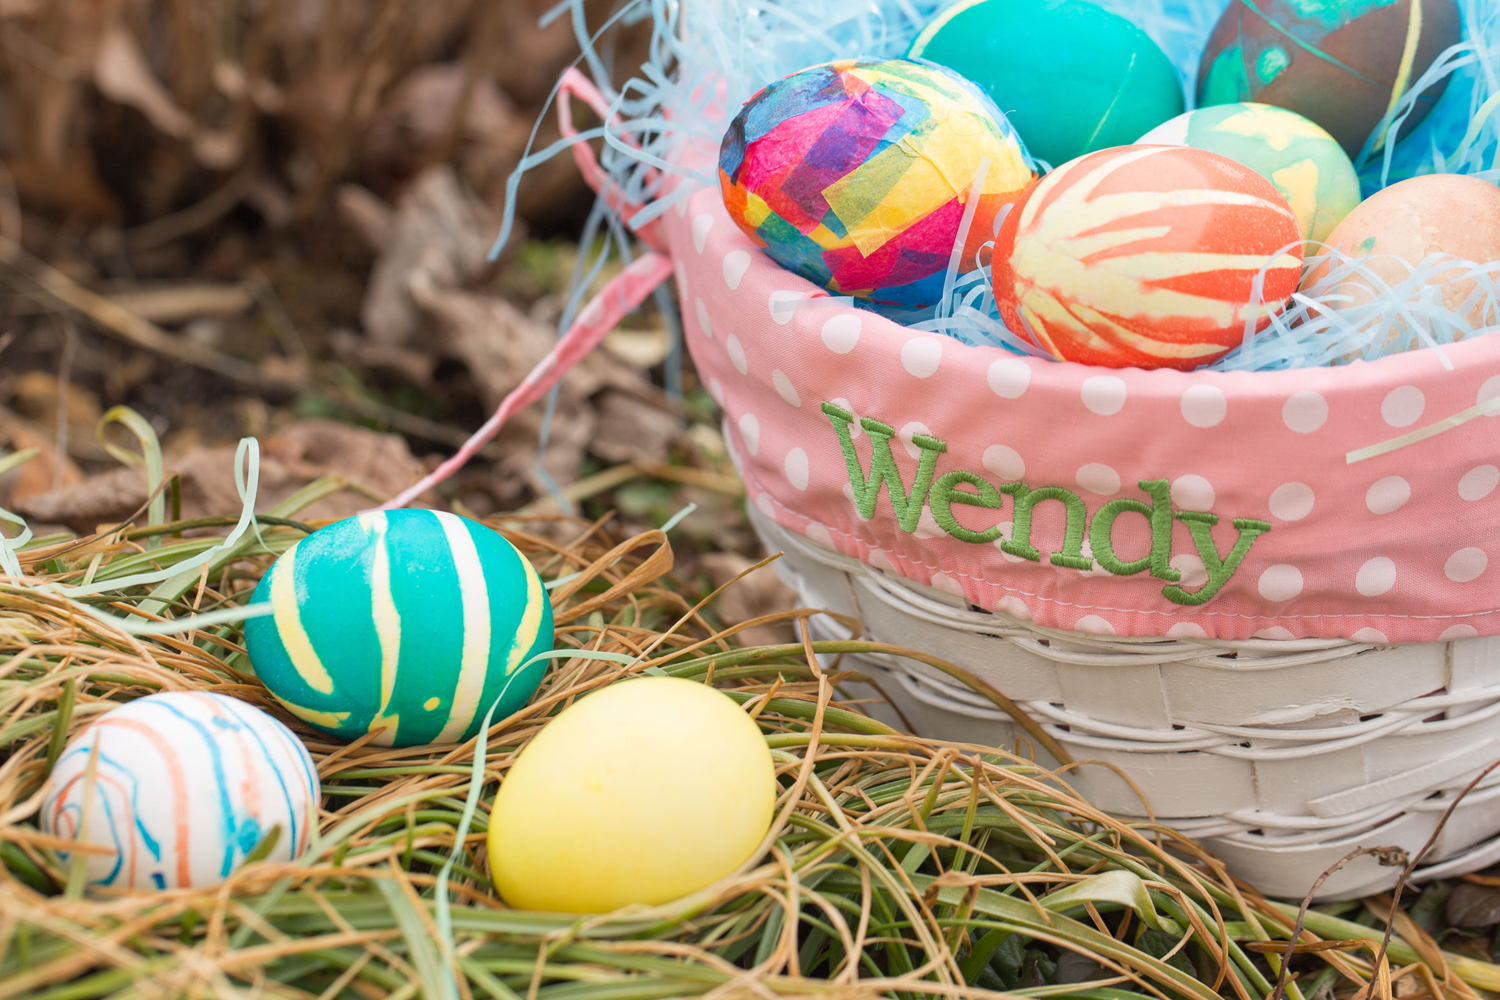
Decorating your Easter eggs in an unexpected way makes another treasured holiday memory, especially when you get the kids to roll up their sleeves and join the party. Here are some ideas to help you fill your basket with fun and creative eggs. Each one is quick and easy to complete, and none requires a degree in fine art.
Decorate With Rubber Bands
Although dyeing Easter eggs is a pretty routine event, you can take your eggs to the next level with just a few extra supplies. For instance, Piera Jolly, president and founder of JollyMom.com, suggested wrapping rubber bands around a hard-boiled egg to create a festive pattern. Give the kids a handful of rubber bands, and let them go to town creating their masterpieces.
Once you’ve secured the bands, dip the egg into dye until it reaches the desired color. The kids can let the colors get as light or as dark and rich as they want.
When you’re done with dye, remove the rubber bands and marvel at your intricate pattern. To take your color to that psychedelic level, dye the egg first, then wrap it in rubber bands before dyeing it again.
Decorate with Foam Stickers
If rubber bands don’t inspire the Easter spirit, try using foam stickers or cut your own shapes from masking tape or transparent tape, Jolly said. Let the kids place the stickers on the egg, then place in egg dye. Layer that color on by dyeing the egg in different shades.
Keep the kiddos busy while dyed eggs air dry, then remove the stickers to reveal their designs. Jolly cautioned against using traditional paper stickers because they will disintegrate in the dye, leaving behind a sticky residue.
Decorate As Farm Animals
Kids love unleashing their inner Picasso when it comes to dyeing Easter eggs. But why stop at coloring your Easter eggs when you can add character to them? With just a few pieces of felt, some pipe cleaners and markers, the kids can turn ordinary Easter eggs into a band of barnyard friends. A great craft project for the kids, you can use any type of egg: plastic, hard-boiled or egg shells with the yolks removed. To get started on your farm family, choose a plastic pink egg or a dyed hard-boiled egg to transform into an adorable pig. If using an egg shell, you can color the shell with a marker after the yolk is removed. This step is better for older kids or mom and dad, who have a gentler touch to help prevent a broken shell.
Now it’s time to make pig parts. Hand out some kid-safe scissors, and let the kids cut out pig ears from pink felt. Don’t worry if they seem too small or too big, too square or too long. After all, these eggs should be as unique as the kids creating them. When the ears are ready, turn the egg on its side, so that each end represents the front and back of the pig. Choose which end you want for the face; it’s totally up to you! Then, pinch the ears at one corner, and attach to one end of the egg with hot or liquid glue.
For the nose, attach a pink button with glue on the same end of the egg, just below the ears. Let the kids draw on eyes with a black marker; they can get as fancy as they want. It just adds more personality, right? Finally, cut four small pieces of a pink pipe cleaner, and glue to bottom of egg for pig legs. Remember, though, that hard-boiled “pigs” are a bit hefty, so they may not stand up on the “legs” due to their weight.
Once the kids make their pigs, they are ready to create other farm animals; just use the previous steps as a guide. For instance, kids can cut out small bunny ears, bunny feet and bunny teeth from felt. Add a fuzzy ball for that little cotton tail and attach to the egg with glue. Add a small fuzzy ball for a nose, along with six short pieces of string (three on each side of nose) for whiskers. Draw in eyes with black marker. Let the kids use their imagination to decorate eggs as their favorite animal: cows, chickens, ducks – whatever they can dream up!
Decorate with Tissue Paper
If you want to avoid the piping hot stove or glue gun altogether, Erica Deuel, editor and writer for SpoonfulofImagination.com in Cumming, Georgia, suggested decorating plastic eggs with tissue paper. Make sure to have glue and a craft adhesive on hand.
You also can cover raw eggs with tissue. Deuel said to poke a hole in one end of the eggs, and let the yoke and everything slowly drain out. Or, make it a contest for kids to see whose egg will drain first. May the fastest egg win! Don’t fret about that tiny hole throwing off your design, it will ultimately be hidden by the tissue.
Pick out the colors of your tissue paper, perhaps choosing hues that will pop in the customized liner of your basket. Have the children cut the tissue paper into small squares; you will need quite a few cut-up squares to cover each egg. Put a dot of glue on the egg and stick a piece of tissue paper on it. Do this step until the entire surface of the egg is covered, then set aside until the glue is completely dry.
After the tissue paper and glue dry on the eggs, the kids can cover them with a good coat of craft adhesive using a sponge brush. To do so, paint one side, let it dry and then paint the other side, Deuel said. The adhesive binds all the unglued edges of the tissue paper to the egg while also giving it a nice shine. Let the eggs dry completely.
Show Off
Designing and creating one-of-a-kind Easter egg designs is a fun project for the entire family. However, your finished eggs just may be too pretty for a game of hide-and-seek in the backyard. Gather them up in your personalized Easter baskets and put them on display for your family and friends to enjoy. Egg decorating is lots of fun, but if if you feel like decorating eggs without using actual eggs, you can color and craft with these printable Easter egg templates too!
Do you have a tried-and-true Easter egg design that’s the envy of your friends every year? If so, share it with us in the comments below.


