Related Articles

DIY Home Gardening
Maybe you have a friend who’s always impressing you with the tomatoes she grew. Maybe you want to start incorporating more fresh herbs and vegetables into your cooking, but want to cut the costs. Maybe you’ve always wanted a garden but don’t have the space you need. Maybe you’re just worried your plants will die within the week.
If so, you’ll be glad to hear that indoor gardening is actually quite easy and friendly to beginners. Here are three ideas to get you started, no matter your experience level.
Beginner: Herbs
Who doesn’t like having fresh herbs on hand? They can cost an arm and a leg at the grocery store, but they’re simple to grow on your own. It doesn’t take much effort to put together a window herb garden, which can go a long way toward livening up your home in the winter. Most herbs do well with natural light, so no need for a grow light (although lights are certainly an option if you don’t have a suitable window). Stick them in a pot, place it in a south-facing window and you’ll have fresh herbs throughout the year.
Lots of herbs grow best from cuttings rather than seedlings, which you can get at a local nursery or even at a grocery store (many grocery stores sell entire plants of basil, mint and other common herbs). Whatever you’re growing, just follow the directions in terms of watering and plant food, and in no time, you’ll have more fresh herbs than you know what to do with.
Intermediate: Vegetables
Decades of engineering produce for appearances has led to grocery stores full of fruits and vegetables that look great but don’t taste like much. Farmer’s markets and farm share boxes are a great option for more flavorful produce, but you can also easily grow your own vegetables at home, too.
Indoor vegetables can be slightly more difficult than herbs–but only slightly. They need more space and are usually heavier, so you might have to support the plant as it grows. You can use a large pot or build a planter box out of untreated wood. As with herbs, a south-facing window is ideal, but grow lights are fine if there’s not enough sun. Follow the directions for whatever vegetable you’re growing and be sure not to overwater, a common mistake of seasoned and inexperienced gardeners alike.
Advanced: Constructing a self-watering planter
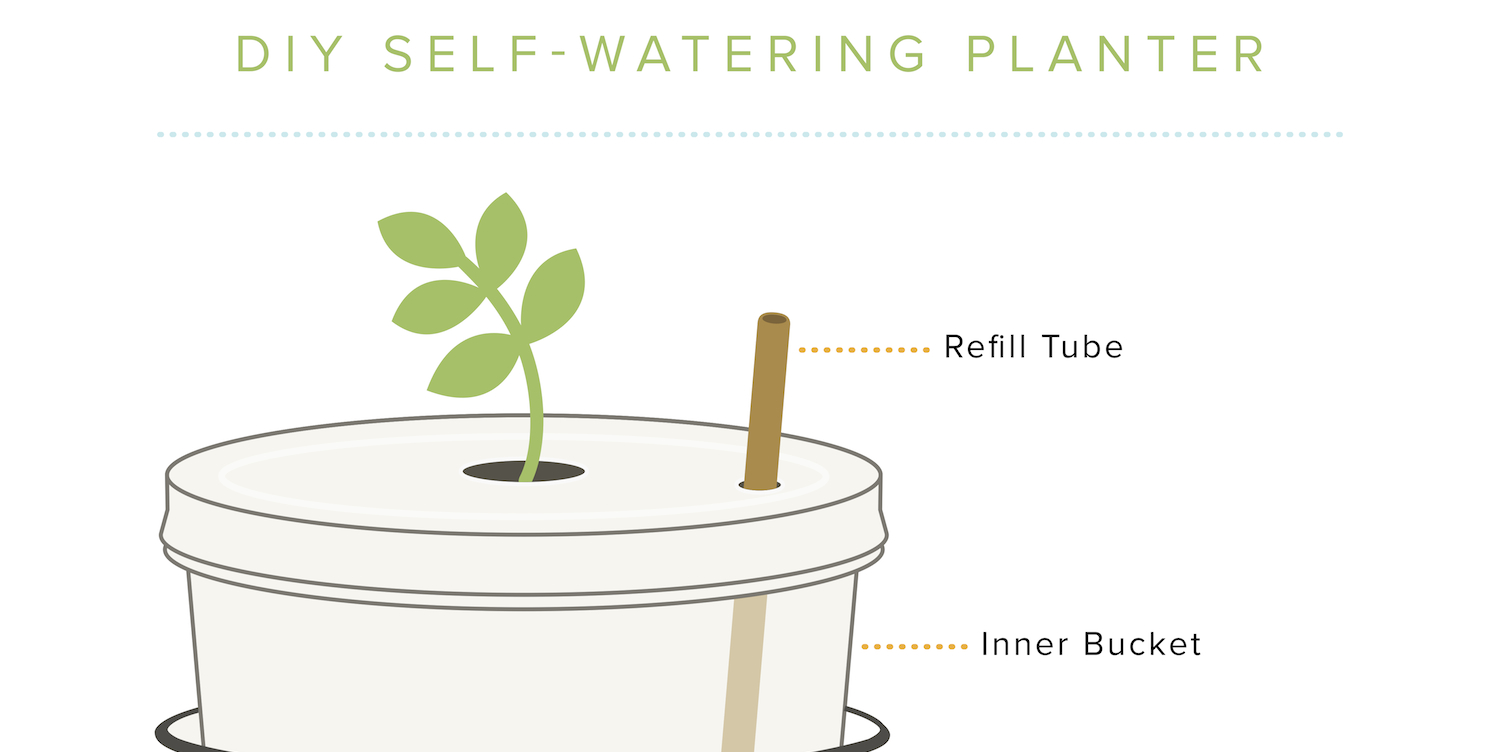
Don’t be intimidated! Putting together a self-watering planter is much simpler than it sounds. The basic idea is a container for the plant above a reservoir, with something to wick water up to the roots, regulating the amount of moisture that reaches the plant.
A self-watering planter has five basic parts:
A container for water: A good-sized reservoir in the bottom will let you water the plant less frequently.
A container for soil and the plant: This should fit into the reservoir container and leave enough room in the bottom for a substantial amount of water.
A wick: The wick steadily draws water up from the reservoir into the soil. One option is to use cloth, usually cotton (though mildew is a risk with cloth wicks). Another solution is to cut a hole in the bottom of the inner soil pot that can hold in place a small container with holes drilled in it, such as a yogurt cup. The cup hangs down into the water reservoir, and, when filled with soil, performs the same wicking action as a piece of cloth.
A way to refill the reservoir: This could be a hole in the side of the outer container or a tube running through both containers to allow you to fill from the top (be sure to cut the bottom of the tube at an angle to enable steady flow). With smaller, lighter containers you could easily lift the inner pot out to add water.
An overflow hole: A small hole a quarter inch or so below the bottom of the soil container will keep the soil from getting waterlogged and the roots from rotting.
A few things to keep in mind:
- You can use just about anything for your two pots, from wine or soda bottles to plastic buckets to garbage cans (make sure the plastic is food-grade, however). The most important thing is that one fits securely into the other while leaving enough room for water on the bottom.
- As with any other type of container, be sure to follow the unique requirements of whatever plant you’re trying to grow. Some plants, including many herbs, don’t do well in soil that is consistently moist. (Basil, on the other hand, requires lots of water and might be a good first plant to try in a smaller self-watering container.)
- Use the right kind of soil. Garden companies make soil mixes specifically for self-watering setups, ensuring that enough moisture is wicked and that the soil doesn’t become waterlogged.
- Use the right size container for the plant you’re growing. Plants with more extensive root systems, such as tomatoes, need a larger container.
Whether you try your hand at herbs to start with or go straight to a self-watering planter, you may be pleasantly surprised to find that your thumb’s greener than you think. If you’re feeling inspired, share with us some of your favorite gardening projects. Happy gardening!


