Related Articles

How to Make a Diaper Cake for Baby Showers
Finding a gift for a baby shower can be a challenge for those who want to give something special that will be remembered. A diaper cake is a festive (and useful) way to turn simple blankets and toys into something magical that you can be sure won’t end up collecting dust in a drawer. Diaper cakes combine the practical with the unexpected, and they’re surprisingly easy to make. The mother-to-be will laugh, and you’ll give her something that she’ll treasure and use for months to come.
Do a Little Shopping
Before getting started, you’ll need to purchase a few items to construct your masterpiece. Choose size 2 diapers for your cake, since many babies never wear the newborn size, and they grow out of the size 1s astoundingly quickly. Make your cake colorful by picking washcloths and blankets in different shades and patterns. Use a special toy or stuffed animal as a cake topper. You can also use rattles, teething rings, bottles of shampoo or baby oil to jazz up the cake decorations. Here is a complete and handy shopping list:
- 60 diapers
- Thick cardboard
- 7 washcloths or teething blankets
- 67 rubber bands
- 3 extra-large rubber bands
- Empty paper towel roll
- Pencil
- 2-inch wide ribbon
- Double-sided tape
- ScissorsCake topper
- Toys for decoration
Let’s Get Rolling
Start by rolling each diaper tightly into a cylinder starting from the crotch up to the waistband. You’ll secure them by wrapping a rubber band around the center. This gets a bit tedious, but think of how beautiful something as mundane as a diaper will be when you’re all finished. Roll the washcloths and secure them in the same way; these will make up the top tier of the cake, so it will look extra fancy.
Layering the Cake
To build the first tier, start by standing the paper towel roll in front of you. Surround the roll with diapers, so it looks like pillars around a tower. Then place another circle of diapers around the first, and then a third circle. Hold the diapers together with an extra-large rubber band wrapped around the entire tier. You’ll likely use 36 diapers for this tier, though of course it depends on how tightly you’ve rolled them. If you’re cake isn’t looking positively adorable yet, don’t worry, it will once you cover the rubber bands with ribbon.
Now place this tier on top of the cardboard and draw a circle around it. Cut out the circle and place the first tier on top of it. You’ll find that this will give the diaper cake a strong base and make it much easier to transport.
For a middle layer, all you have to do is create a second, smaller tier of rolled diapers on top of the first. You’ll probably use only 18 diapers, or so, for this layer. You should secure this tier with your second large rubber band. Keep going, it’s looking more like a cake every minute.
Here come those washcloths. Arrange the rolled washcloths on top of the second tier, placing one in the center and surrounding the center washcloth with the other six. Use your creativity here by alternating the colors of the washcloths, or you could even make a rainbow. Wrap the third large rubber band around the rolled washcloths. Then slide a pencil through this top layer and down into the second tier to secure the tiers to one another. You don’t want the top layer toppling over at the party.
Final Flourishes
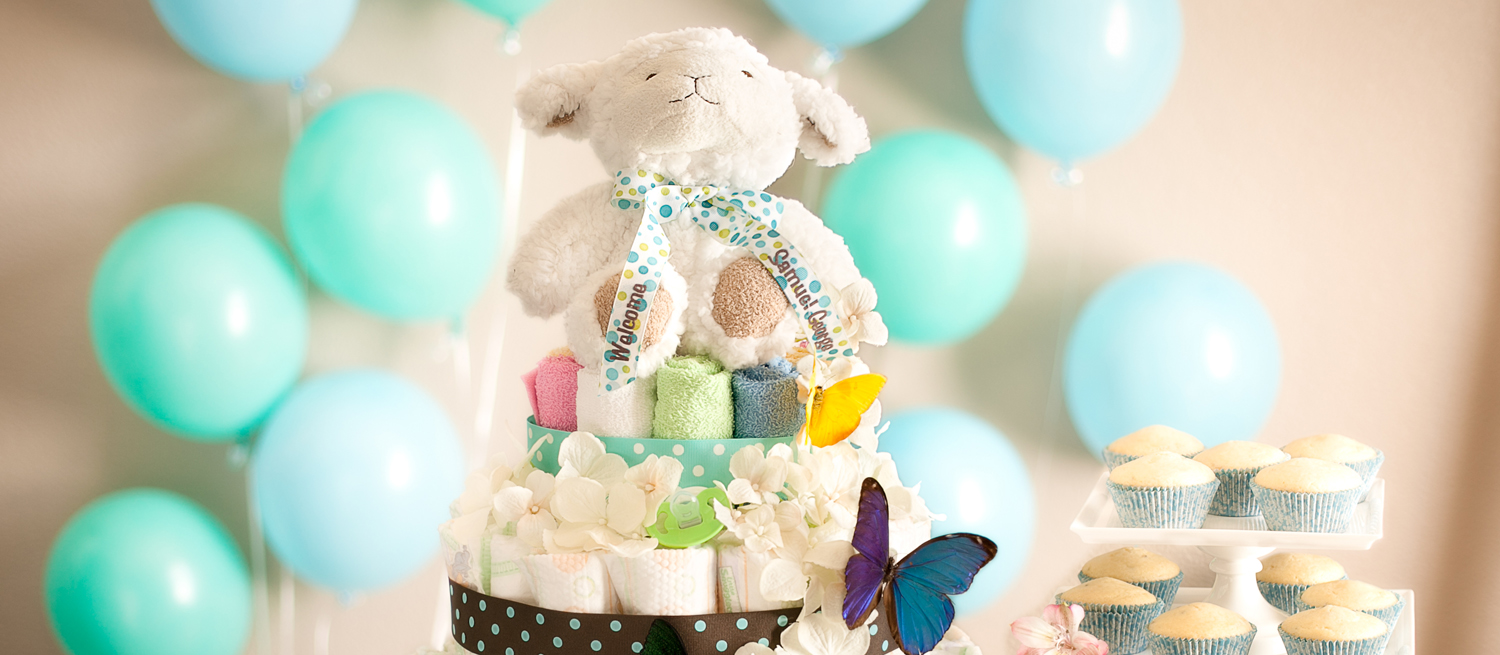
Still doesn’t look like a cake? Just wait. Wrap the ribbon so that it covers the large rubber bands holding the tiers together. Secure it with double-sided tape and do that with each tier. Place any toys, supplies and whatnot in and around each layer — work with a theme, like under-the-sea, jungle or ABCs. Top off the cake with something so sweet that it might just turn into the new baby’s favorite toy: a Personal Creations Soft and Snuggly Lamb would be just the thing. Present the cake to a room filled with “awwws” and applause.
Was Your Cake A Hit?
Did the mother-to-be love it? Did she think it was a real cake? Let us know how the party was and how you made the cake your own.


